1. 安装配置GPU环境
1.1. 安装GPU版TF
在之前我们已经安装了CPU版的TensorFlow,为了使用GPU来加速计算,我们必须安装GPU版的TensorFlow。这里我们可以直接使用pip命令来安装:
apip install tensorflow-gpu==2.0.0-alpha0安装完成后我们后我们可以查看一下当前可用的GPU:
from tensorflow.python.client import device_lib
def get_available_gpus():
local_device_protos = device_lib.list_local_devices()
return [x.name for x in local_device_protos if x.device_type == 'GPU']
print(get_available_gpus())
由于本人机器上有两块GPU,所以输出两块GPU的编号:“[‘/device:GPU:0’, ‘/device:GPU:1’]”。
1.2. 安装显卡驱动
根据你的显卡型号到官网(https://www.nvidia.cn/Download/index.aspx?lang=cn)下载对应的驱动。我的服务器上有两块Tesla P100的显卡,如图所示选择对应的驱动程序。这里一定要注意选择正确的版本,要和你的显卡版本、操作系统版本以及想要安装的CUDA版本一一对应。
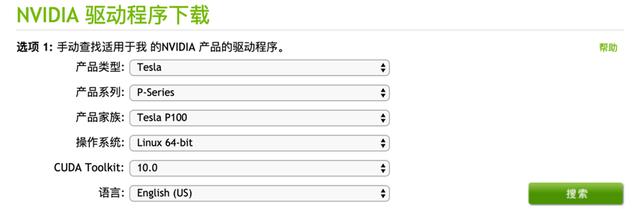
NVIDA驱动下载列表
点击搜索,然后点击下载即可。
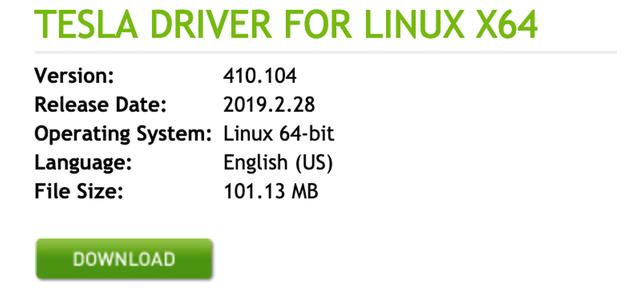
NVIDA驱动下载提示
安装完成之后可以使用“nvidia-smi”命令查看显卡。
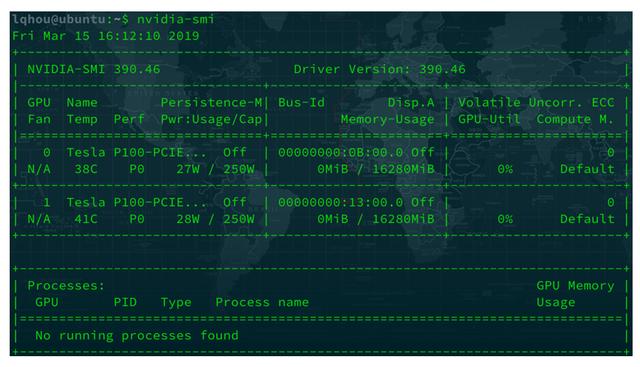
显卡信息
1.3. 安装CUDA
在安装CUDA之前,我们一定要先搞清楚TensorFlow各个版本与CUDA版本的对应关系。在TensorFlow官网有相似的说明(https://tensorflow.google.cn/install/source),其中Linux系统环境下TensorFlow GPU版本与CUDA版本的对应关系如图所示。
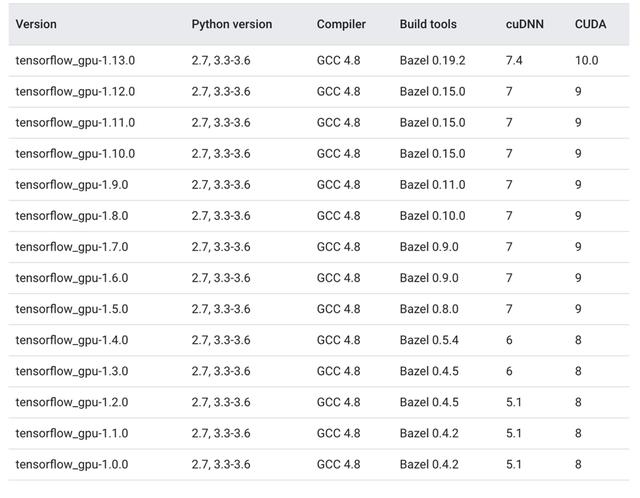
TensorFlow与CUDA的版本对应关系
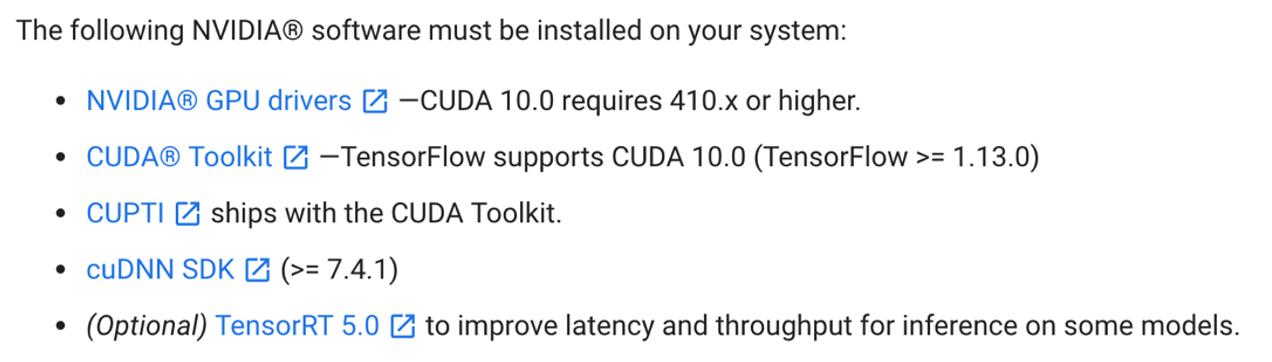
TensorFlow2.0 GPU版依赖的NVIDA软件包
TensorFlow-GPU的2.0.0-alpha版对应的NVIDA驱动版本、CUDA版本、cuDNN的版本号。
1.3.1 下载CUDA
首先我们到NVIDIA官网(https://developer.nvidia.com/cuda-toolkit)下载CUDA。
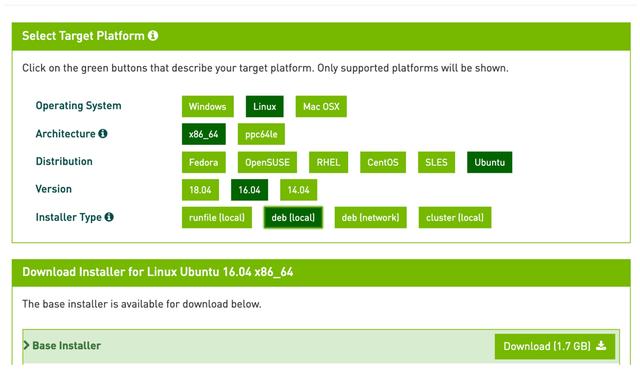
选择对应的CUDA版本
选择对应系统环境的CUDA版本,点击下载。
1.3.2 安装CUDA
CUDA下载页面有安装指引,如图所示。
CUDA的安装步骤
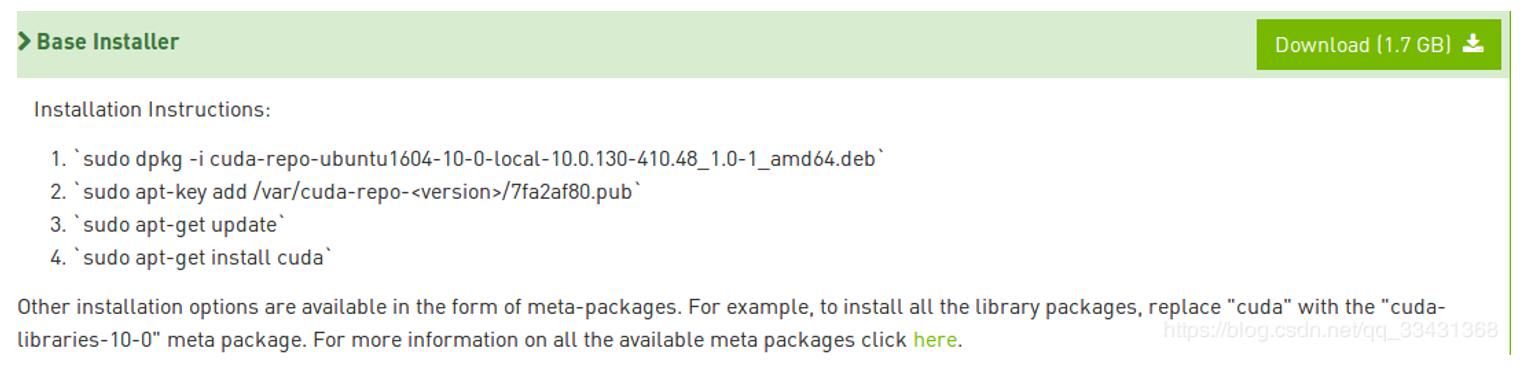
第一步:执行安装命令
sudo dpkg -i cuda-repo-ubuntu1604-10-0-local-10.0.130-410.48_1.0-1_amd64.deb第二步:添加kay
sudo apt-key add /var/cuda-repo-10-0-local-10.0.130-410.48/7fa2af80.pubupdate第三步:依次执行
sudo apt-get updatesudo apt-get install cuda-10.0注意不要使用“sudo apt-get install cuda”,这样默认安装的是最新版,所以一定要指定版本。
安装完成后,在“/usr/local”目录下会生成“cuda”和“cuda-10.0”两个文件夹,如图所示,我们可以使用命令“cat /usr/local/cuda/version.txt”查看CUDA版本。

第四步:设置环境变量
打开“~/.bashrc”文件,在文件的最后最后添加如下内容:
export PATH=/usr/local/cuda-10.0/bin${PATH:+:${PATH}}export LD_LIBRARY_PATH=/usr/local/cuda-10.0/lib64${LD_LIBRARY_PATH:+:${LD_LIBRARY_PATH}}在终端执行命令“source ~/.bashrc”让环境变量生效。
第五步:验证安装是否成功
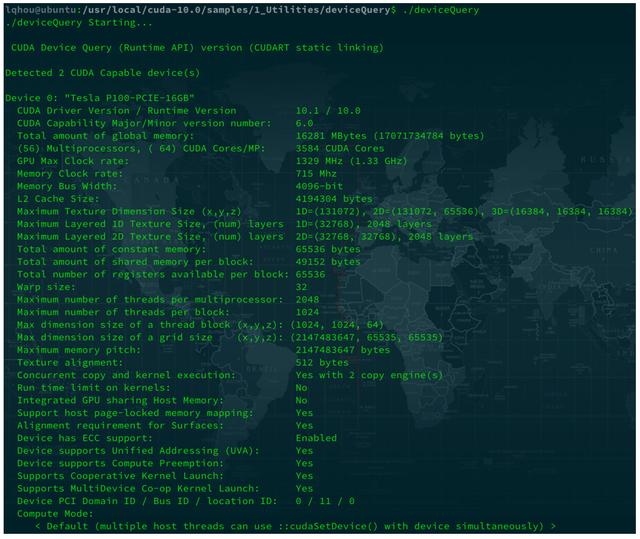
- 进入目录“/usr/local/cuda-10.0/samples/1_Utilities/deviceQuery”中打开终端;
- 终端下执行编译命令:sudo make
- 然后执行命令:./deviceQuery,可以看到两块GPU的信息
如图所示,检测到两块显卡,图中是其中一块显卡的信息。到这里CUDA已经安装完成了。
显卡的信息
1.4. 安装cuDNN
1.4.1 下载
(https://developer.nvidia.com/rdp/cudnn-download)
这里一定要下载与CUDA10.0对应的版本。下载CNDNN需要登录NVIDIA账号,没有的话,可以按照提示创建一个账号。

cuDNN与CUDA的版本对应关系
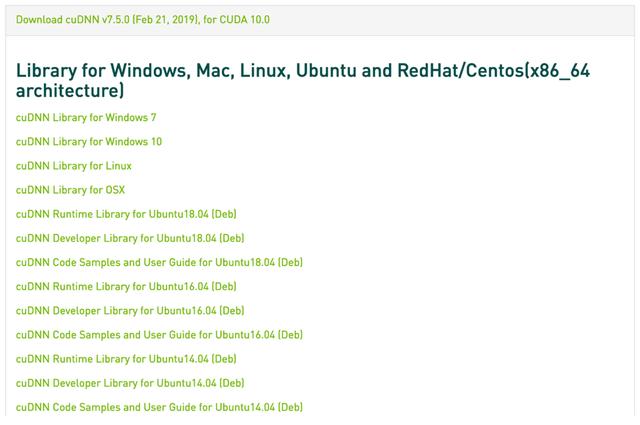
选择好cuDNN版本后,点击下载“cuDNN Library for Linux”,如图所示。
cuDNN下载列表
1.4.2 安装
第一步:解压文件
tar zxvf cudnn-10.0-linux-x64-v7.5.0.56.tgz第二步:拷贝文件,并修改文件权限
sudo cp cuda/include/cudnn.h /usr/local/cuda/includesudo cp cuda/lib64/libcudnn* /usr/local/cuda/lib64sudo chmod a+r /usr/local/cuda/include/cudnn.h /usr/local/cuda/lib64/libcudnn*到这里TensorFlow2.0的GPU版就安装配置完成了。
2. 使用TensorFlow-GPU
如果我们的机器上安装配置好了GPU版的TensorFlow,那么运行的时候TensorFlow会自行去选择可用的GPU。我们也可以通过“os.environ["CUDA_VISIBLE_DEVICES"]”来选择我们要使用的GPU:
import tensorflow as tfimport os# 选择编号为0的GPUos.environ["CUDA_VISIBLE_DEVICES"] = "0"# 创建模型model = tf.keras.Sequential()model.add(layers.Dense(16, activation='relu', input_shape=(10,)))model.add(layers.Dense(1, activation='sigmoid'))# 设置目标函数和学习率optimizer = tf.keras.optimizers.SGD(0.2)# 编译模型model.compile(loss='binary_crossentropy', optimizer=optimizer)# 输出模型概况model.summary()我们选择了编号为“0”的这个GPU,执行完上面的这段代码后我们使用命令“nvidia-smi”来查看一下GPU的占用情况,如图所示,编号为“0”的GPU正在被占用。我们可以将代码中的“0”改为“1”来使用另一个GPU。
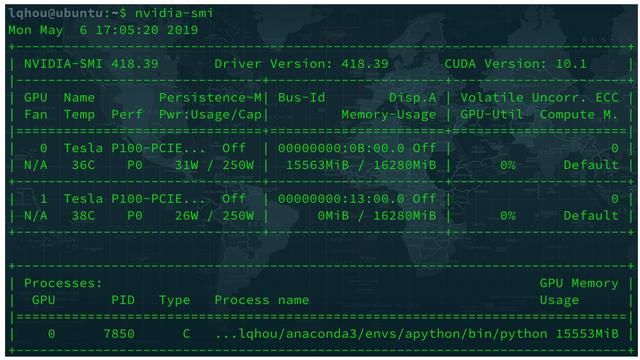
查看GPU占用情况
如果我们希望使用多块GPU,例如同时使用“0”、“1”两块GPU,可以设置“os.environ["CUDA_VISIBLE_DEVICES"] = "0,1"”,除此之外我们还可以使用TensorFlow为“tf.keras”提供的分布式训练策略“tf.distribute.MirroredStrategy”来实现单机环境下的多GPU训练:
import tensorflow as tffrom tensorflow.keras import layers strategy = tf.distribute.MirroredStrategy() # 优化器以及模型的构建和编译必须嵌套在“scope()”中with strategy.scope(): model = tf.keras.Sequential() model.add(layers.Dense(16, activation='relu', input_shape=(10,))) model.add(layers.Dense(1, activation='sigmoid')) optimizer = tf.keras.optimizers.SGD(0.2) model.compile(loss='binary_crossentropy', optimizer=optimizer) model.summary()